How many times do you turn a garage door spring is one of the most asked questions especially by DIY enthusiast. However, before getting the answer, it is important to note that springs should only be fixed by skilled professionals. Springs are the most dangerous part of the door of your garage as they can cause serious injuries or death. Therefore, getting the count of times you need to turn the spring is not enough. Below is a detailed process on how to go about it.
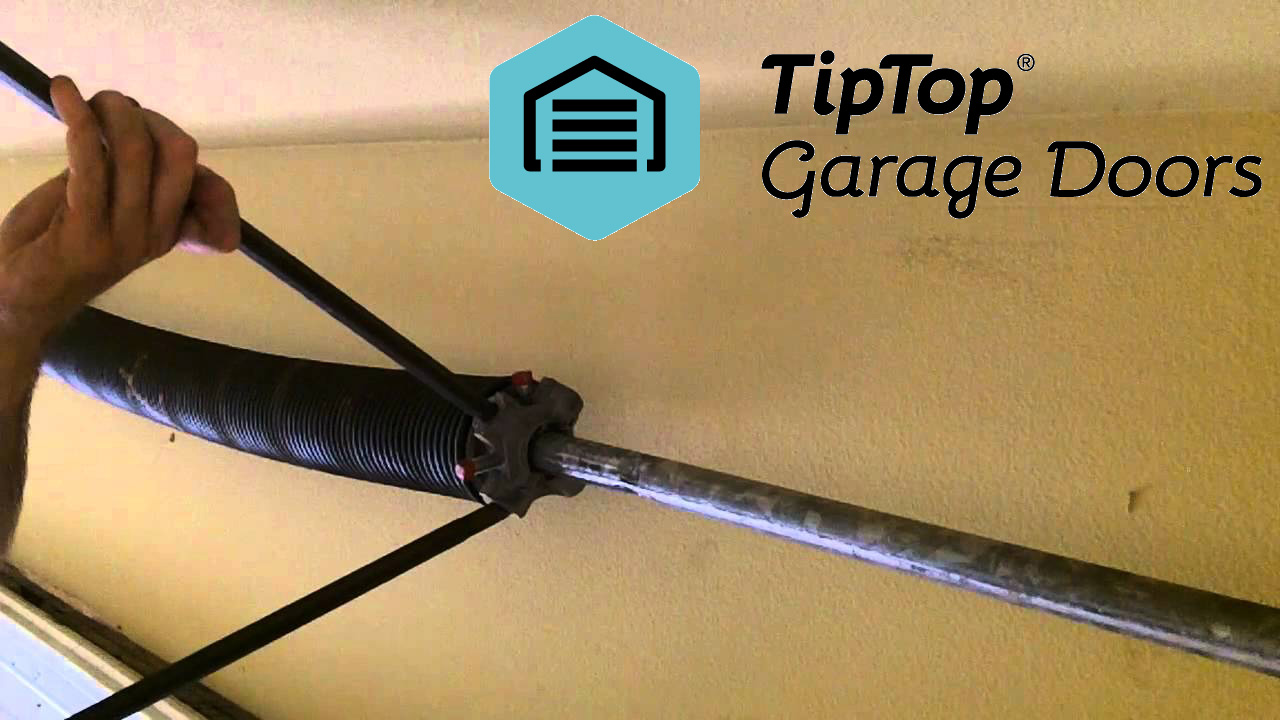
Mark the shaft
Marking the shaft is highly recommended before turning the spring. The mark should be put beyond the winding cone as you will use it as an indicator whether you have turned the springs on the right side of the brackets. Note that fully turned torsion springs tend to extend in length towards the proper direction. If you notice that the spring does not grow as you turn it, it is an indication that you are turning towards the wrong direction. In this case, contact a technician to check whether it is properly installed.
Tape the winding bar
Applying a tape on the winding bar ensures that it does not get off the cone when turning or stretching the spring. Remember that you should stretch the torsion spring after turning it. This is made possible by the shaft that runs horizontally along the end bearing plates.
First spring turn
Ensuring that you have all the tools required at hand it is time to start the turning the springs. Before you start, assess everything to make sure that you are safe as your safety comes first. At this point, ensuring that the end of the spring is facing up towards you on the winding con, turn the springs. In order to make a complete turn, make the winding movement as if you are unscrewing the winding cones from the extreme end of the springs. Turn the spring up till you achieve ¼ turn and reach the resistance level. This completes your first turn.
Second turn
To achieve the second turn, insert the second winding bar, raising it to 90 degrees. Repeat the turning process as before. Here, you need to be observant, to notice whether the spring being turned is growing in length. This assures you that the turn is effectively done.
Other 5 spring turns
The 3rd turn is made by raising the second bar up to 90 degrees and inserting the initial one. At this stage, pay extra attention to the length of the spring. If it becomes short, unwind and change the sides. If you are not so sure about the next move, contact a professional to assist you. However, if the spring is still growing in length, continue turning till you achieve 30 counts. When you count 30 turns, you should know that you have completed the remaining five turns. This completes a total of seven spring turns, adequate for a standard garage door. In case of doubts on how many times you need to turn the spring, contact a technician for guidance.