Replacing your garage door springs is a big job that should only be attempted by a qualified professional. However, if you are feeling confident and have the necessary tools, this guide will walk you through the process step-by-step. Be sure to follow all safety precautions to avoid injury.
Table of Contents
- Introduction to garage door springs
- Types of garage door springs
- How to replace a garage door spring?
- Is garage door spring replacement dangerous?
- How many times do you turn the garage door spring?
- Conclusion
Introduction to Garage Door Springs
As a garage door owner, you know that regular maintenance is key to keeping your door and door parts functioning properly. One part of your garage that may need occasional attention is the springs. If one of your springs breaks, it's important to replace it as soon as possible to avoid further damage to your door and opener.
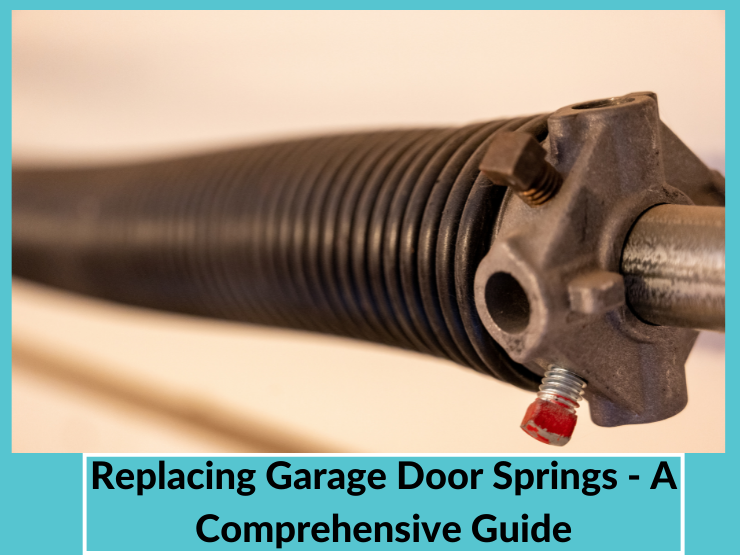
Garage door springs are an important part of the system that allows a garage to function. They maintain balance, safety, and stability when opening or closing your home's entranceway with their high-tension steel construction providing decades worth of durability before it needs replacing.
When your garage door is open, it needs to be able to lift up and close without any problems. If you want this to happen smoothly with no cracks showing on either side of the opener then make sure that there are always springs attached because they're essential for opening or closing them properly.
In this comprehensive guide, we'll walk you through everything you need to know about replacing garage door springs, from selecting the right spring for your door weight to installing it correctly. Keep reading for all the insights from garage door spring experts with years of experience in garage door repair and replacement!
Types of Garage Door Springs
The first thing you should know before replacing your garage door springs is that there are many product types and designs. Some may seem alike but they all serve a specific purpose- from raising or lowering the opener to keeping it in place when open and closed respectively!
Springs play an important role in lifting and holding the door weight. Some springs are suitable for commercial heavy doors while others are designed to work with lighter residential models.
There are two main types of garage door springs used in the installation and operation of garage doors:
- Torsion springs
- Extension spring
Torsion Springs
Torsion springs use the torque of an object against another to lift. They are securely attached at one end by a stationary cone, which has windings on it for installation and removal purposes. Springs in this category share a number of traits that determine the weight and lift distance they can provide for your door.
- Length of the spring
- Wire size
- The inner diameter of the spring
- Wind
Major torsion spring models include:
*Early Set Torsion Springs
These springs are mounted on the torsion shaft near each cable drum, using specific tools.
*Standard Torsion Springs
When it comes to residential doors, the torsion spring is an important component. This tensioning device supports your door by running through with coils below for purposes of providing force when opened or closed. To ensure that your home's springs are installed correctly and safely, it is highly recommended to seek professional advice. The right numbers can be determined with the help of an engineer or designer who has experience in this area!
This means that lighter doors require one standard spring to open them while heavier ones need two.
*Steel Rolling Door Torsion Springs
The torsion bar is a device that connects the hinges to your door. The springs inside this barrel provide tension on one side, which allows for it to be opened or closed smoothly without any clangs!
*Torque Master Torsion Springs
Torque master springs may be the most important part when rebuilding your engine. They provide enough torque to turn all of those tough parts, and they are well secured in place by their winding cones at each end which can only really be accessed through power drilling them out with a specific type bit for this task!
*One-piece Curtain Door Springs
The door springs on your storage unit are two strong to keep it upright. Each of these heavy-duty metal tension rods is fixed at either end with a torsion bar, which keeps things balanced and ensures that no part moves more than another before they start causing problems for you!
*Standard Commercial Springs
The door springs on your storage unit are two strong to keep it upright. Each of these heavy-duty metal tension rods is fixed at either end with a torsion bar, which keeps things balanced and ensures that no part moves more than another before they start causing problems for you!
Extension Spring
Extension springs provide a counterbalancing force that lifts the door and supports its weight. They're typically mounted in residential doors, fixed above horizontal tracks running along with it for opening or closing purposes as needed by users alike!
Extension springs can be a great addition to your garage. They provide the perfect level of hanging space and keep things from sliding around, but what you need is an eye bolt with S-hooks that will fix them securely into place on top of their beam so they don't fall down during use or when not being used at all!
How to Replace a Garage Door Spring?
Garage door springs operate under high tension that enables them to lift the weighty door. Due to frequent use of the door, they break or lose tension after a period of time. In this case, they need to be replaced for the door to function adequately. There are doors that require extension springs while others use torsion springs.
A good example is the overhead doors that use torsion springs that are normally fixed on the central bracket located in the middle of the door. If you choose to use the DIY method to replace the springs, it is important to beware of the risk involved as a slight mistake may lead to snapping of the spring causing injuries.
DIY Garage Door Springs Replacement Process
When installing the product, it is important to have someone else there with you and observe all safety measures. Read instructions provided by the manufacturer before starting the installation process so that any confusion can be cleared up immediately if needed!
Assemble the Tools
Ensure that you have all the tools required that include:
- Wrench
- Ladder
- Bolts
- Chalk
- Winding bars
- New springs
- Unplug the power
When it comes to spring replacement, the first step is closing your door by unplugging the power cord or removing the fuse. Next, you can also disconnect from electricity and take out any current breakers in order for our congregation with these repairs more easily on-site!
Compare the Spring Size
It is important to measure the length and diameter of your old springs before replacing them with new ones. The wrong size can cause pain, especially if it's too loose or tight anywhere along its surface!
Unwind the Old Spring
When you unwind the spring, make sure that it's inside a safe place because this is where all your patience will be needed. Get as close to 18 inches or more for safety reasons and put on some gloves just in case anything spills onto them while working with sharp tools near an open flame! The tension will be unbearable if you don't remove it quickly. Use your fingers to spin the winding bar clockwise, then insert another piece into its appropriate hole and push down hard while pulling up on both ends at once until all of that uncomfortable force has been relieved!
Remove the Bolts and Screws
The cable drums are at the end of your door. You will have to loosen their screws and then slide out spring-like holders that hold them in place before you can remove these parts from inside there!
Insert the New Spring
To fix the springs, place them on their respective sides with wider holes and secure them using cable drums. Next, repeat this process for the second set of three cables on the opposite ends as well.
Tighten the Shaft and the Bolts
Once the springs are in place, twist the bar present on the door to tighten the shaft of the door. Ensure that the stationary end of the spring is well fixed to the center of the door and fasten the bolts.
Wind the Spring
Use the bar to add tension to the spring using the wrench. Observe safety as the spring can snap and cause injuries to your body. Remember that DIY spring replacement is highly discouraged so contact a professional.
Is Garage Door Spring Replacement Dangerous?
Replacing the garage door spring is an easy process but a dangerous one. That’s why the whole spring task should be left to technicians. Here are the dangers of DIY garage door spring replacement.
Threat to Your Life
Garage door springs pose an imminent threat to life as their injuries are normally fatal in nature. As an experienced handyman, you may have great skills in assessing the door problem, cleaning, crews, and nut tightening as well as lubrication. High spring tension and a heavyweight door mean that you need to be careful when working on these projects. An accurate screwdriver set with the right tools will help ensure your safety, as well as keep things running smoothly for years!
The force of a torsion Spring can cause serious bodily harm or even death. When replacing the spring, it is important that you allow skilled technicians access to do so safely because there have been reports about snapping springs during installation which causes this type of injury in some cases!
Buying the Wrong Door Spring
The spring of your garage door is one thing that can make or break its life. You have different options to choose from, like torsion springs which operate with either voltage all., galvanized steel strands called "galvanizing" and extension forces powered by horsepower. When installing your garage door, make sure that you purchase the right springs for it. The DIY process can be cheap but if done incorrectly may end up costing more than just buying a new one!
Incorrect Installation
When the installation of the springs is incorrectly done, there are many negative impacts on a garage door. One such impact could be that it continues to give off faulty sounds when opening or closing and will also have a crooked hanging position as well as being broken entirely due in part to improper workmanship during this process
When installing springs, you need to have the right tools and an extra person or two who can help with installation. Skipping any of these steps could result in injury for yourself as well as others depending on where this is being done! Save time by hiring a professional instead.
Problem Misdiagnosis
Good garage door performance depends on how well your hardware works together. You should identify the source of any problems so you know what to do next, and it's important for this process to start with a thorough inspection!
When you're a DIY enthusiast and diagnose the door problem incorrectly, it can result in wrong remedies. For example, The tension springs may be faulty because of loss which could easily be solved by winding them up again; instead, someone would think they need to replace them with new ones!
In this case, you lose several dollars while you endanger your life while trying to remove the existing springs that are still intact. Call a professional to assess the problem for correct diagnosis and safe garage door spring replacement.
How many times do you turn the garage door spring?
However, before getting the answer, it is important to note that springs should only be fixed by skilled professionals. Springs are the most dangerous part of the door of your garage as they can cause serious injuries or death. Therefore, getting the count of times you need to turn the spring is not enough. Below is a detailed process on how to go about it.
Mark the Shaft
Marking the shaft is highly recommended before turning the spring. The mark should be put beyond the winding cone as you will use it as an indicator of whether you have turned the springs on the right side of the brackets. Note that fully turned torsion springs tend to extend in length towards the proper direction.
If you notice that the spring does not grow as you turn it, it is an indication that you are turning in the wrong direction. In this case, contact a technician to check whether it is properly installed.
Tape the Winding Bar
Taping the winding bar ensures that it does not get off of your cone when turning or stretching a spring. Remember, you should always stretch torsion springs after they've been fully wound with tape on either end. This makes for an easy installation process.
First Spring Turn
Ensuring that you have all the tools required at hand it is time to start turning the springs. Before you start, assess everything to make sure that you are safe as your safety comes first. At this point, ensuring that the end of the spring is facing up towards you on the winding con, turn the springs. In order to make a complete turn, make the winding movement as if you are unscrewing the winding cones from the extreme end of the springs. Turn the spring up till you achieve ¼ turn and reach the resistance level. This completes your first turn.
Second Turn
When you reach the second turn, insert another winding bar and raise it to 90 degrees. Then repeat what was done before but this time watch carefully if there is an increase in length of spring as that would indicate your rotation has been effective
The other 5 Spring Turns
The 3rd turn is made by raising the second bar up to 90 degrees and inserting the initial one. At this stage, pay extra attention to the length of the spring. If it becomes short, unwind and change the sides. If you are not so sure about the next move, contact a professional to assist you. However, if the spring is still growing in length, continue turning till you achieve 30 counts. When you count 30 turns, you should know that you have completed the remaining five turns. This completes a total of seven spring turns, adequate for a standard garage door. In case of doubts on how many times you need to turn the spring, contact a technician for guidance.
Conclusion
Garage door springs are an important part of the garage door system. They help to balance the weight of the door and keep it in place. It is important to know how to replace a garage door spring, in case it breaks or malfunctions. The process of replacing a garage door spring is not difficult, but it can be dangerous if you do not take proper precautions.
We hope this comprehensive guide has helped you understand everything you need to know about replacing garage door springs. If you have a problem with your garage door springs, it’s best to call a professional to come and take a look at them. We can help you with all your garage door needs, including the replacement of garage door springs. Give Tip Top Garage Doors a call today!